So, you are ready to list your apartment, house, basement or room. Exciting! Realhaus makes it easy for you to connect with quality renters in just a few steps
Log in to your Realhaus Account
Head over to app.realhaus.ca and sign in to your account.
Don’t have an account yet? Visit the getting started article to learn how to create and verify your account.
🏠 Go to the Manage Properties Section
Once logged in:
- Click on “Manage Properties” from the main menu.
- Navigate to the Listings tab.
This is where all your rental properties will live—whether they’re active, under review, or archived.
➕ Add a New Property & Create a Listing
You’ll see a button labelled “Add New Property.” Click it to begin creating your listing.
If this is your first time creating a listing, you will be directed to the new listing page to provide information about your listing.
You need to fill in the required information, including:
- Location of the property
- Full address, City and Postal code
- Type of Property
- Property type (i.e. Apartment, Basement Suite, House, etc)
- The year the property was built
- The size of the property
- Number of Bedrooms and Bathrooms in the property
- Description of the Property
- Mention the best features of your property (i.e. in-suite laundry, AC, parking, nearby transit, etc), any special amenities, and what you love about the neighbourhood.
- Pictures
- Upload clear, well-lit images (living spaces, kitchen, bathroom, exterior)
- Title
🖼 Listings with high-quality photos and detailed descriptions get more views and applications!
Double-check the information you have provided for accuracy, then click the Create Listing button.
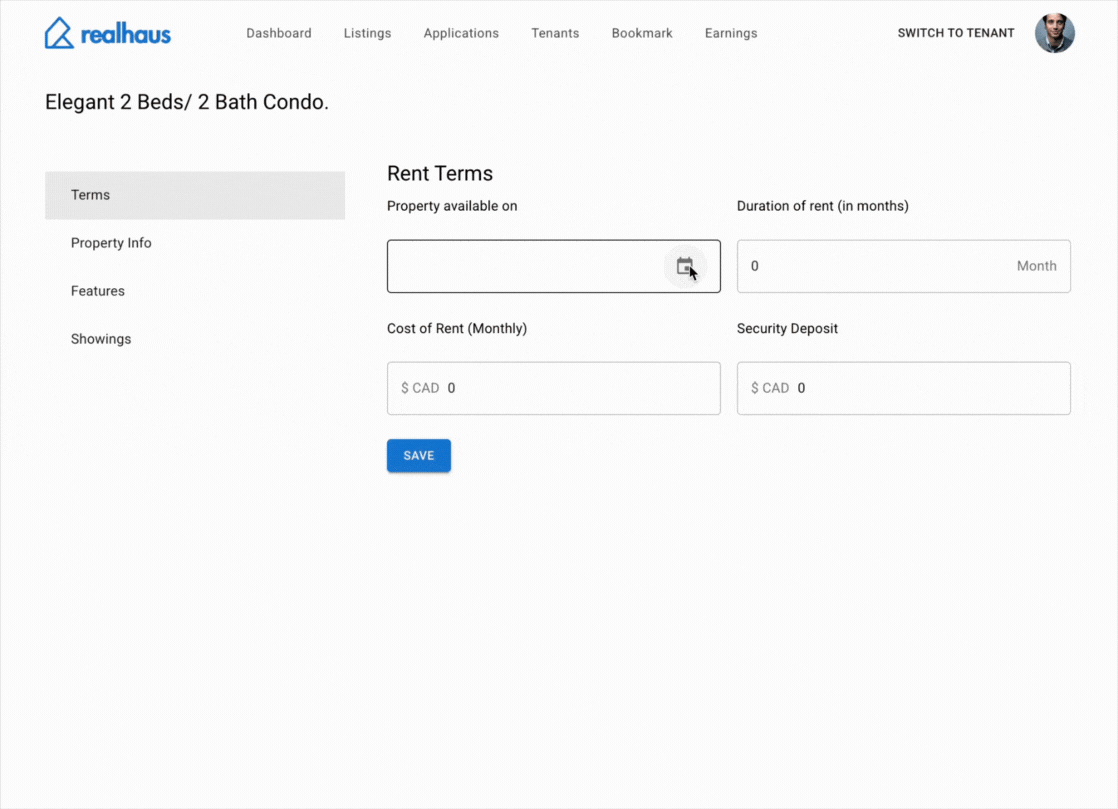
Specify Terms
After you have created the listing, you will need to update its terms. The following information is required:
- The Date the listing is available
- The Duration of the rent
- The Rent Amount
- The amount for the Security Deposit
Specify Features
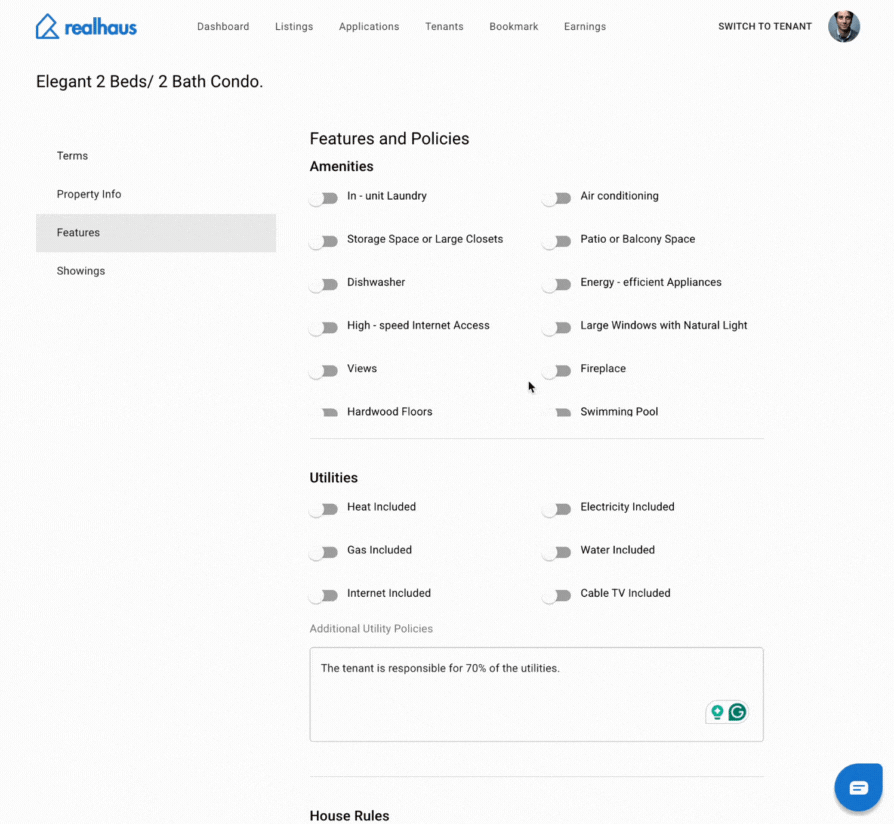
Now that you’ve entered the basic info and terms for your property, it’s time to showcase what makes your place stand out.
In this step, you’ll select all the features, amenities, and included utilities that come with your rental.
This helps renters quickly understand the value of your property and whether it suits their needs.
By accurately completing this section, you increase your chances of attracting tenants who are a good match—and reduce unnecessary questions down the line.
Create showing timeslots
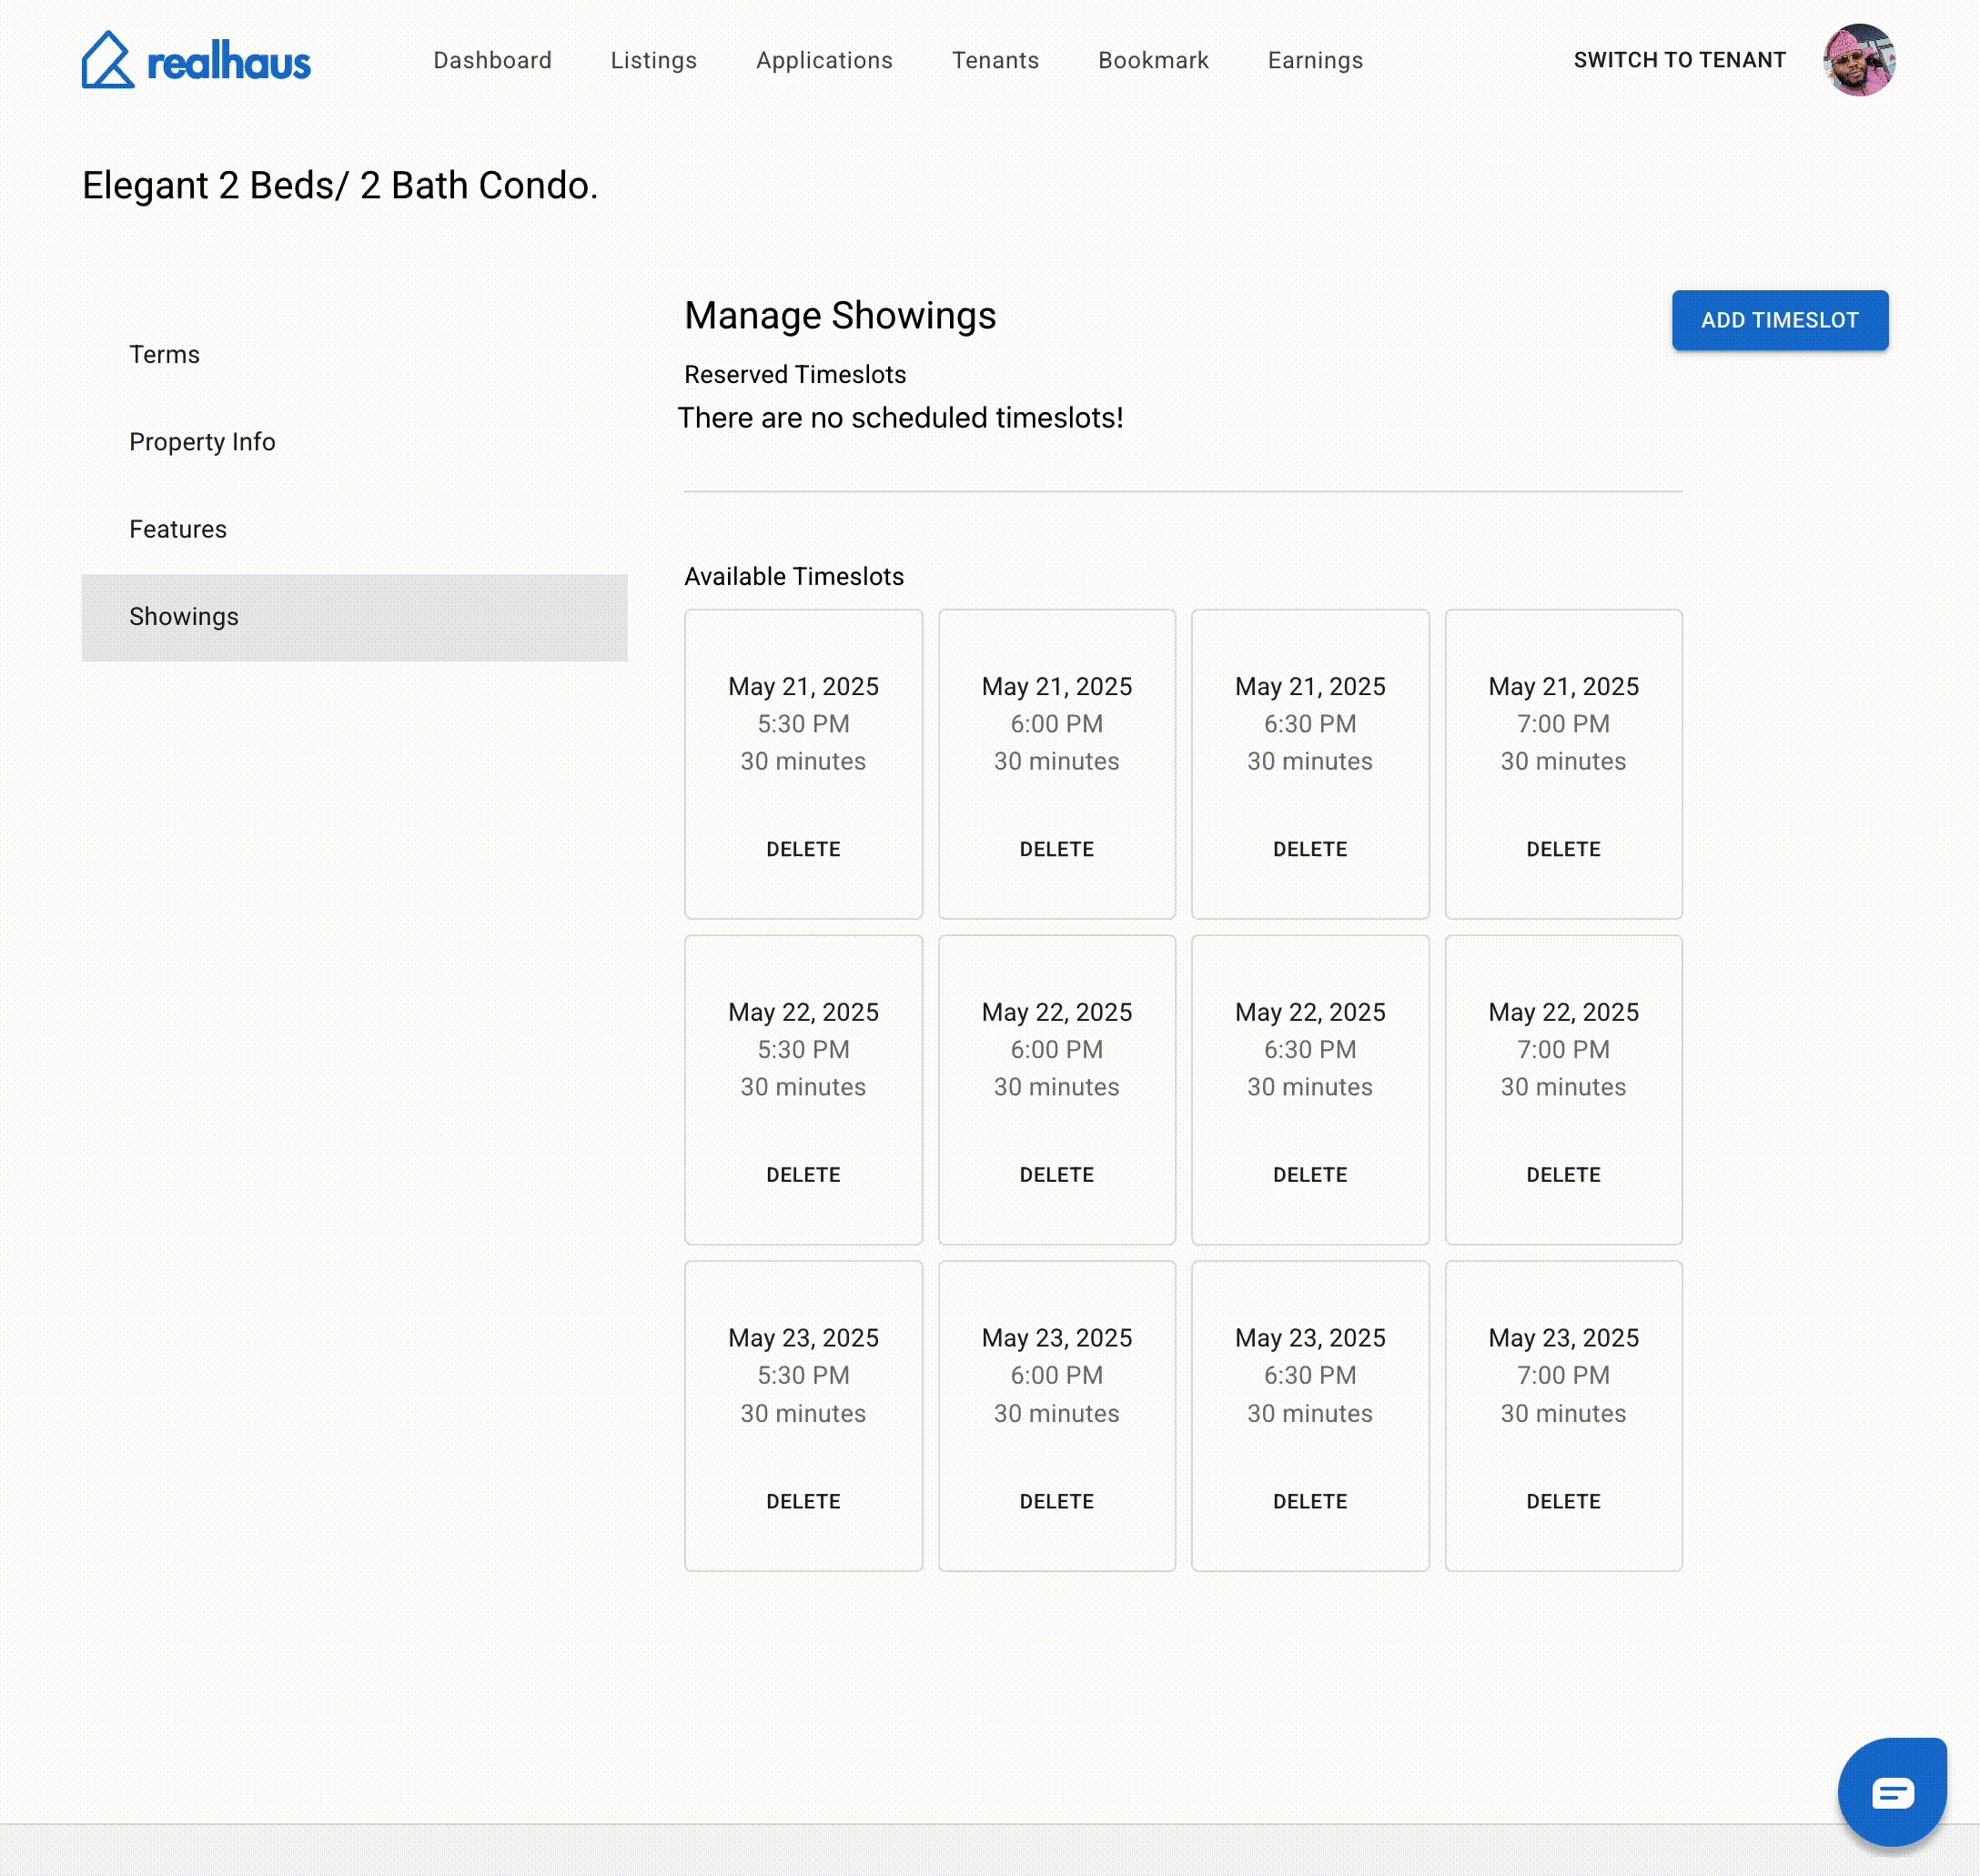
After providing all details about the property, updating the terms, and selecting features, the next step is to let potential renters know when they can view the property.
Why Set Timeslots?
Scheduling time slots makes the viewing process organized and efficient – for both you and prospective tenants.
It also ensures you’re only contacted for available times that work for you.
You’ve now completed all the steps to create and publish your listing on Realhaus:
- Entered property details
- Set rental terms
- Selected features and included utilities
- Scheduled available showing times
Your listing will appear on the listings page